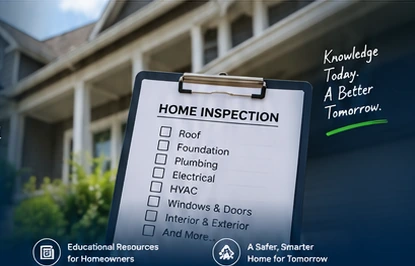
DIY Home Inspection Checklist:
Pros, Cons & Tips
Buying or maintaining a home is one of the biggest investments you will ever make. Understanding the condition of a property is crucial, and while professional inspectors provide detailed reports, a DIY home inspection checklist can help homeowners and buyers catch obvious issues early. This guide explains how to conduct your own inspection, the benefits and limitations, and how modern AI tools can help you organize what you find.
Quick answer: A DIY home inspection is a visual walkthrough of the accessible parts of a property. Use it to check the roof, exterior, foundation, attic, interior, plumbing, electrical, HVAC, windows, doors, appliances, drainage, and signs of moisture. It is best used as an early screening and maintenance tool—not as a replacement for a professional home inspection.
What Is a DIY Home Inspection?
A DIY home inspection is a structured walkthrough performed by the buyer, seller, or homeowner rather than a professional inspector. The goal is not to certify that the home is safe or defect-free. The goal is to spot visible conditions, document concerns, and know which questions to ask next.
For homeowners, the same routine can become an annual maintenance habit. For buyers, it can help screen properties before you spend money on deeper due diligence. For sellers, it can expose maintenance items before they become negotiation surprises.
How to Conduct a DIY Home Inspection
A useful inspection follows the building in a logical order. Start outside, where water and weather affect the structure. Then move through the roof and attic, structure, mechanical systems, and interior.
- Water stains on ceilings or walls
- Sagging floors or structural cracks
- Musty odors or visible mold-like growth
- Damaged roofing, missing shingles, or clogged gutters
- Outdated-looking or visibly damaged electrical components
Document your findings with photos and detailed notes. When possible, take a close-up photo of the concern and a second photo showing where it is located in the room or on the exterior.

Start With Safety
The most important rule is simple: do not create a hazard while looking for one. Stop the walkthrough and contact the appropriate professional if you encounter a strong gas odor, sparking or scorched electrical components, active flooding near electrical equipment, visibly unstable structural elements, extensive mold-like growth, or any area requiring unsafe climbing or entry.
Do not remove electrical panel covers, enter a confined crawlspace you are not trained to enter, walk a steep or wet roof, disturb suspected hazardous materials, or operate equipment you do not understand.
What to Bring
- Bright flashlight
- Phone or camera
- Measuring tape
- Notepad or digital notes app
- Outlet/GFCI tester if you know how to use it safely
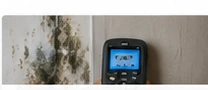
- Small moisture meter for screening suspicious areas
- Binoculars for roof and upper-exterior viewing from the ground
- Disposable gloves and safety glasses
1. Inspect the Exterior and Roof
A home's exterior tells you how effectively the building has been managing weather and water. Water is one of the most common causes of expensive property damage, so drainage deserves immediate attention.
Roof
Observe from the ground whenever possible. Look for missing, lifted, cracked, patched, or heavily worn roofing materials; sagging roof lines; deteriorated flashing; damaged chimneys; and visible issues around skylights, vents, and other penetrations.
Gutters and drainage
Look for loose gutters, overflow staining, clogged sections, and downspouts that discharge directly beside the foundation. Roof water should be managed away from the structure.
Siding, trim, windows, and doors
Check for rot, swelling, open joints, cracked masonry or stucco, failed sealant, staining, damaged siding, and deterioration around utility penetrations.
Grading, vegetation, decks, and porches
Look for standing water, erosion, soil directing water toward the building, vegetation touching siding or roofing, loose railings, visible rot, damaged supports, and unstable stairs.
2. Check the Foundation and Structure
Not every crack means a structural problem. What matters is whether several observations appear to tell the same story.
- Foundation cracks, particularly horizontal or stair-step patterns
- Visible displacement or offset
- Sloping or unusually bouncy floors
- Doors or windows that repeatedly bind or will not latch
- Sagging ceilings or bowed walls
- Altered or improvised structural framing
A single sticking door may be minor. A sticking door, sloping floor, stair-step masonry crack, and foundation movement occurring in the same area are far more meaningful together.
3. Look for Water and Moisture Problems
Water problems often reveal themselves indirectly. Look for ceiling or wall stains, bubbling paint, swollen baseboards, warped flooring, musty odors, dark staining, damp crawlspaces, condensation, mineral deposits, peeling basement coatings, and soft flooring around wet areas.
A dry stain does not prove the problem is solved. Ask where the water came from, whether the source was repaired, and whether concealed damage might remain.
4. Inspect the Attic
If the attic can be entered safely, it can provide useful clues about the roof, ventilation, insulation, pests, electrical work, and moisture.
- Roof stains or active leaks
- Damp or compressed insulation
- Sagging, cut, or altered rafters/trusses
- Blocked ventilation
- Bathroom or dryer exhaust terminating into the attic
- Pest evidence
- Mold-like growth or persistent musty odor
- Exposed electrical splices or open junction boxes
5. Check the Plumbing
Walk through the home and operate accessible plumbing fixtures. Look below sinks, around toilets, tubs, showers, dishwashers, washing machines, visible piping, and the water heater.
Watch for active leaks, corrosion, swollen cabinetry, loose toilets, poor drainage, low water pressure, sewer odor, stained ceilings below bathrooms, improvised repairs, and water-heater leakage.
6. Perform a Basic Electrical Review
Electrical systems have clear limits for DIY inspection. You can safely observe missing outlet covers, loose receptacles, scorch marks, buzzing, extension cords used as permanent wiring, open junction boxes, exposed wiring, and visibly improvised electrical modifications.
Stop immediately if you notice sparking, burning odors, melted components, overheating, or visible arcing. Those are not DIY troubleshooting situations.
7. Check the HVAC System
Operate heating and cooling equipment only when appropriate for the weather and normal equipment operation. Look for unusual noises, vibration, dirty filters, water around equipment, rust, damaged ducts, weak airflow, improvised condensate drainage, and heavy staining around registers.
Age is worth recording, but age alone does not tell you whether equipment has failed. Condition, maintenance history, and observed operation matter too.
8. Inspect Windows and Doors
Open and close several windows and doors. Look for failed seals, fogging between panes, rotten frames, water staining, damaged weather stripping, drafts, doors that rub, and openings that will not latch correctly.
Again, patterns matter. One sticking window may be hardware. Several misaligned doors and windows in the same part of the house deserve more investigation.
9. Check the Kitchen, Appliances, and Laundry
The kitchen and laundry areas combine electrical, plumbing, ventilation, and appliance risks. Check under sinks, around dishwashers, disposal connections, refrigerator water lines, washing-machine hoses, appliance cords, and dryer venting.
A dryer vent that is crushed, disconnected, heavily restricted, or terminating indoors should be corrected.
10. Inspect Bathrooms
Bathrooms are common locations for hidden moisture. Check around toilets, showers, tubs, sink plumbing, exhaust fans, walls, ceilings, and flooring. Look for missing sealant, damaged grout, loose toilets, soft flooring, slow drains, staining, and chronic condensation.
When possible, also inspect the ceiling directly below an upstairs bathroom.
11. Check the Basement or Crawlspace
Lower-level spaces can reveal conditions that are barely visible elsewhere. Look for standing water, damp soil, damaged vapor barriers, mold-like growth, wood decay, plumbing leaks, pest activity, damaged insulation, improvised supports, and damaged floor framing.
A persistent musty odor should not automatically be dismissed as “just a basement smell.”
Pros of a DIY Home Inspection
Used for the right purpose, a structured DIY walkthrough can add real value.
- Earlier screening — Spot visible concerns before investing further in a property.
- Better questions — Turn vague concerns into specific questions for sellers and inspectors.
- Hands-on learning — Understand where major systems are and how the home is put together.
- Maintenance awareness — Identify small issues before they become expensive repairs.
- Better inspection context — Tell your professional inspector what you noticed.
Cons and Limitations
A self-inspection becomes risky when it creates confidence the evidence does not support.
- Limited expertise — An untrained observer may miss patterns or hidden hazards.
- Hidden defects — Walls, insulation, finishes, roofing, and stored belongings can conceal issues.
- Severity can be misjudged — Cosmetic defects can be overvalued while serious symptoms are dismissed.
- Limited tools and interpretation — Instruments are only useful when the results are understood.
- No independent professional report — Your notes are not equivalent to a documented professional inspection.
How ChatGPT Can Help With a DIY Home Inspection
AI tools are most useful for interpretation and organization, not diagnosis. You can use ChatGPT to identify unfamiliar components, explain possible causes of visible symptoms, organize findings by priority, identify which specialist may be appropriate, and compare notes from several properties.
- Explain unfamiliar components in plain language
- Suggest possible causes of visible symptoms without pretending to diagnose
- Sort findings into urgent, further evaluation, maintenance, and monitor categories
- Identify the type of professional who normally evaluates the issue
- Build a comparison table across multiple properties
AI should not be used to declare a structure safe, identify mold or asbestos from a photograph, certify wiring as code-compliant, estimate roof service life with certainty, or prove that a hidden defect does not exist.
The Better Workflow: DIY + AI + Professional Inspection
- Perform your own walkthrough. Use a consistent checklist to identify visible concerns.
- Photograph and document. Record what you saw and exactly where you saw it.
- Use AI to organize questions. Clarify terminology, possibilities, priorities, and the appropriate professional.
- Hire a professional home inspector. Give them your areas of concern and allow an independent evaluation.
- Read the full inspection report. Understand what was found, why it matters, what is urgent, and what belongs on a maintenance plan.
When Should You Stop the DIY Routine and Call a Professional?
Some conditions deserve professional attention immediately. Do not attempt to personally “diagnose” them just to avoid paying for evaluation.
- Suspected structural movement
- Active water intrusion
- Major roof damage
- Extensive mold-like growth
- Repeated sewer backups
- Gas odors
- Overheated or visibly damaged electrical equipment
- Unstable decks or stairs
- Major foundation displacement
- Significant termite or WDO activity
Specialized Testing You May Need
A standard visual inspection does not answer every property question. Depending on the property, transaction, and observed conditions, additional services may be appropriate.
Final Thoughts
A DIY home inspection checklist can make you a more informed buyer, seller, or homeowner. It can help you notice visible defects earlier, ask better questions, compare properties, understand maintenance needs, document concerns, and prepare for a professional inspection.
What it cannot do is prove that a home is defect-free. Almost every property has defects. The goal is to understand what you are buying, what may need attention, what could cost money later, and which concerns deserve professional evaluation before you make a major decision.